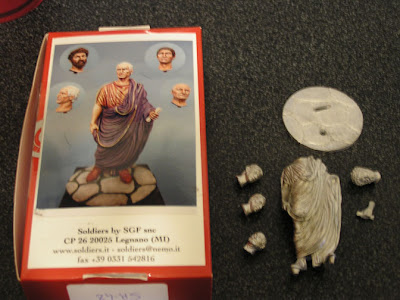
I recently acquired this fantastic figure from Soldiers of a Roman Senator in 54mm. Let's face it, I buy everything that A. Laruccia does for this and other manufacturers (Art Girona Historical Series, older EMI etc.) as his sculpting is absolutely the best you can get in this or any scale. This kit is no exception and as can be seen in the photo, comes complete with a choice of four portrait heads giving the painter some ability to separate their work from others with little effort. My desire to always expand my skills by creating new challenges and to display my work in a way that sets it apart from others was really challenged by this figure. Let's face it the subject can be boring to some despite the challenge of all that cloth. So how do you present this figure in a way that others haven't seen before? Well I have an idea that is based on the effect of non-standard lighting on a figure and it's surroundings. The painting shown below, "Ecce Homo" by Antonio Cesari, gives me a lot of ideas and is a great reference for how my chosen lighting should appear.
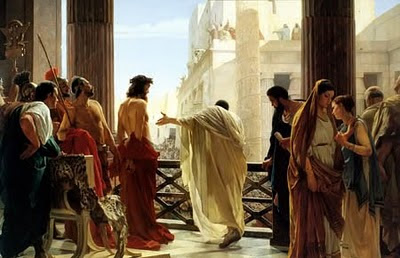
The type of lighting I will be attempting to duplicate is "halo" lighting which simply means that the light source will be from behind the figure. In addition there will be "reflected" light from an unseen marble wall directly in front of the figure. Examples of this lighting can be singled out above, in the figure of Pontius Pilate and the others. The reflected light can be seen well in the female figures to the right side of the painting, as well as on Jesus' back.

This photo of Roman ruins in late afternoon golden sunlight helps to show my color pallet for the reflected light source.
I have chosen a tall column made by Armand Bayardi for true scale effect as can be seen in the photo below. On the surface this might seem to be a poor choice as the size would seem to overpower the figure. However my vision of painting the piece will highlight the figure and draw the eye away from the top and bottom of the unit. The top of the column will be in shadow and as can be seen, I have chosen a black base. Only the figure and a portion of the column will be well lit. This will draw the eye always back to the figure.
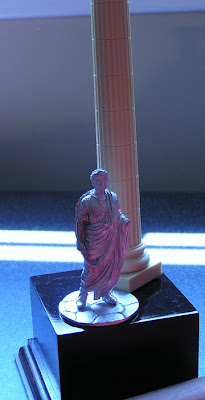
In this picture I staged the miniature on the base with the column in front of a window full of sunlight for the back lighting. In addition I placed a piece of red paper to the front right to replicate reflected color from our mythical wall to show the effect of the soft colored light. This will give you and idea of the direction I am planning to go on this figure. My next post will be centered on the creation and priming of the base, with a few interesting tricks for priming with shadow and highlight tones.

 As I have begun to paint the base, my prep work turned to the figure. I normally wouldn't dedicate a post entirely to figure prep when so little effort was required on my part, however this figure really shows the quality of work that Mr. Laruccia is capable of creating. As stated earlier in my posts, this kit comes complete with four heads to choose from. They are believed to represent Caesar, Vespasian, Trajan and lastly Marcus Aurelius (the head that I chose). Each face is brilliant and each choice gives the modeler a variety of artistic visions for painting. The depth and crispness of the folds are extremely realistic and will be a challenge to paint no doubt. Besides the torso and head, the only other component is the left hand and document. Clean-up and assembly were very straight forward. I simply thought everyone would enjoy seeing the raw casting before I began to "mess it up" with paint.


