Showing posts with label Technique. Show all posts

Sunday, May 4, 2014

The Battle of Strasbourg - Update #1

Although these pictures are a few months old I wanted to post an update on the SBS for this vignette I have been working on. If you saw my first post you will remember that this will be a two figure vignette, one on foot and one mounted. Progress has been slow but this where we stand at the moment.

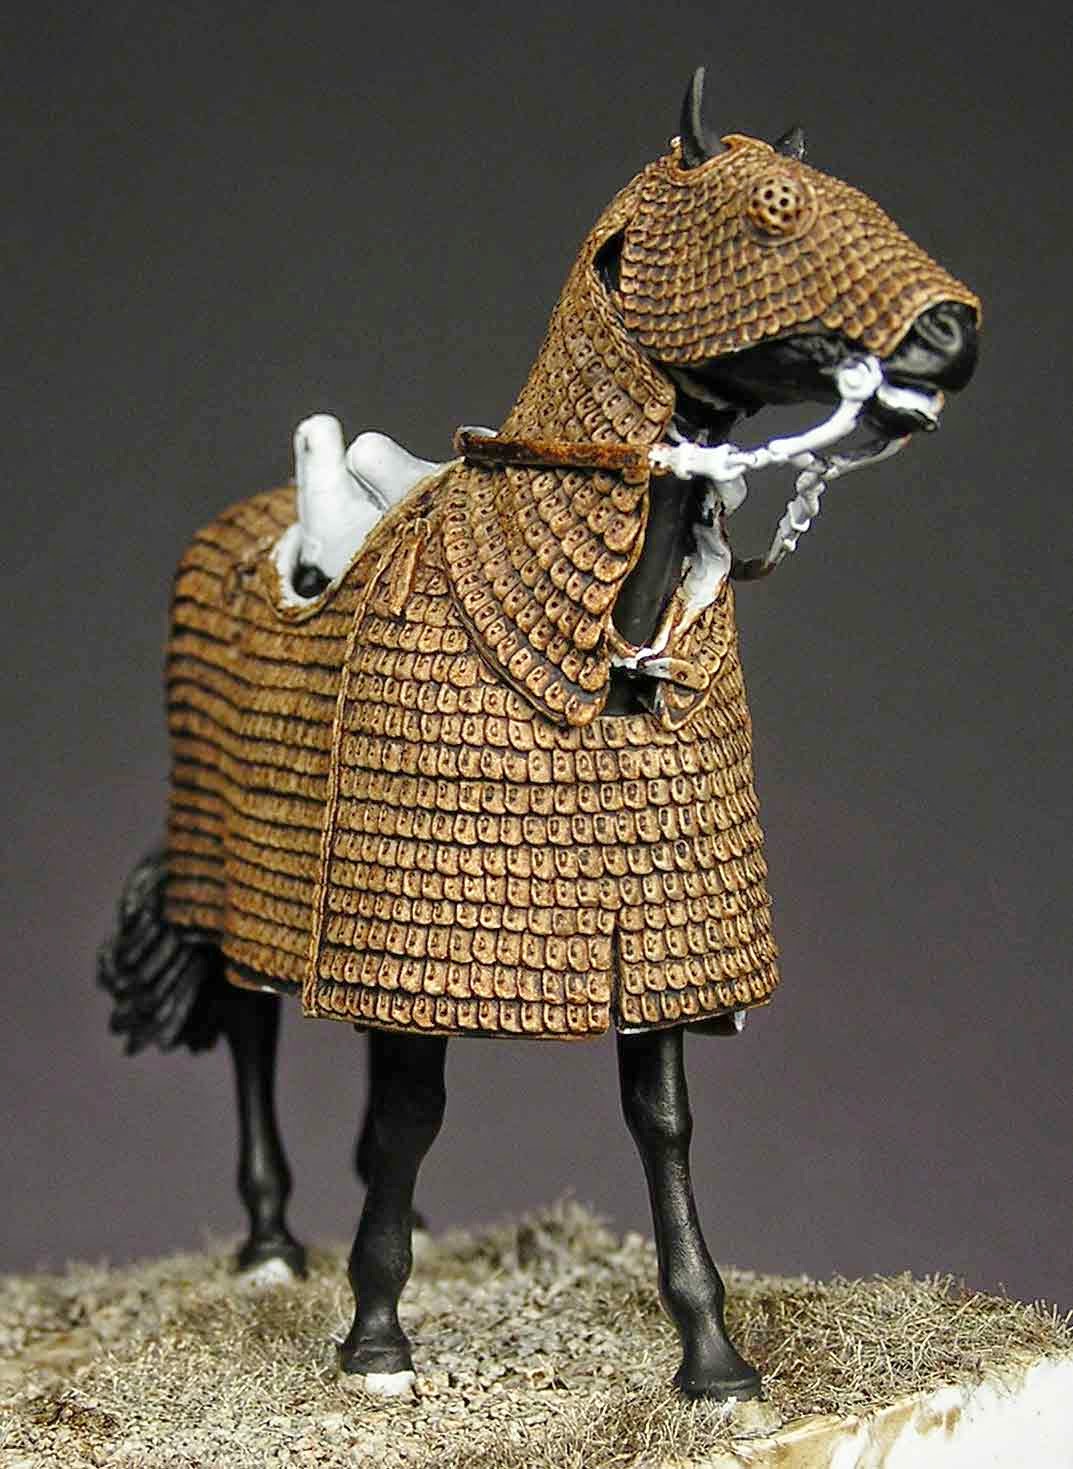


I began by painting the horse a basic mix of Mars Black and Burnt Umber. The armor was given an initial wash of Burnt Umber followed by a second wash of Burnt Umber with a bit of Mars Black added. The groundwork was given initial washes of Burnt Umber and Greenish Umber.


All of the leather was then painted with a mixture of Mars Brown and a touch of Yellow Ochre. The armor was lightly washed with Mars Black to further bring out the detail of the various plates.


The next step was to apply a thin wash of Burnt Umber to all of the leather. This ages the leather, tones down the bright base color and begins to pop out the stitching details. I have also applied some brown glazes to the horse to "warm" the tone a bit.


All of this work is designed to give a broad feel to the look of the horse and his armor. details will now begin to picked out and cleaned up. The armor plates will be NMM on these figures. A lot of my time has been taken up recently with experimentation using acrylics. This piece will be a mixture of both oils and acrylics as I try to hone some of my skills with the new medium. Cloth will be acrylic but the flesh and armor will all be oils. I have attached the rider's legs to the horse and my next post will show progress on him and the foot figure.

Saturday, March 29, 2014

Something is wrong with George! Completion #2


Something didn't feel right about George! I'm a professional and whether I'm painting for myself or doing a commission, it's gotta be right for somebody.

Well after talking with Mike at Michael Miniatures we agree that the bust needs something more. As I said before, this kit is meant to depict George as President. In an effort to make him more "civilian" in appearance I left the colors a bit monotone (blue) and we both agreed the bust needed something more. Thanks to the fact that this is really Mike's kit and that I am painting the box art for him, we were able to determine something that will add interest, a bit of pop and hopefully help people to want this kit even more. George has been depicted wearing the standard blue overcoat but with a red/scarlet lining that carries over to the collar as it folds over the shoulders. This harks back to his Generals coat and really makes this a more appealing paint job.


Now he is done. (I think)

Wednesday, October 16, 2013

El Greco Laconian Hoplite - Helmet and Cloth

 
Progress on the helmet, crest, cloth and hair can be seen in the pictures above and below. I have put together a small step by step series of photos (see below) showing the process over the past few days to get to this point. As for the hair on his head and chest, I basically filled out his beard and hair with a coat of Mars Brown and Burnt Umber. The chest hair was created by repeatedly touching the effected area with a worn W&N "Series 7" 000 brush with thinned Burnt Umber in the hairs.


The first step was to block in the color panels using Mars Yellow, Raw Umber and Mars Black.


These areas of solid color were then stippled and blended with an old soft brush to develop transitions in the tonal values.

 
Orange reflected color was worked into the wet paint as a "reflected" color tone on the helmet (both sides front and right side back).Additionally, a base wash of Cadmium Red Deep, Mars Black and Orange was applied to the crest.

 
Mars Yellow and Titanium White were used to begin highlighting and unifying the finish.

 
Titanium White with a touch of Mars Yellow begins the process of reflective highlighting. The helmet still looks to soft but additional highlighting once the helmet is dry will begin to pull it all together. Cadmium Red Light is used to begin to get the red dyed crest to begin going towards a dyed and faded crest from the period.

 
The tunic cloth was highlighted with Cadmium Red Deep mixed with Titanium White. At this point the chest hair had not been started.


Wednesday, October 9, 2013

El Greco Laconian Hoplite - Flesh and Cloth

 
Further progress on the flesh, hair, eyes and a basecoat of color for the cloth.
 
The face received shadow tones of Brown Madder. This has a slightly redder tone than my usual Burnt Umber. This worked well with the cooler flesh tone I had started with. The highlights are Titanium White with a touch of Cadmium Yellow Deep. The eyes started with a pinkish white base color for the whites with the corneas and pupils picked out in blacks and browns. The hair was started with Burnt Umber and Mars Black. Two layers of color have been applied at this point. A further dark shadow tone will be applied prior to my beginning to highlight and age the hair a bit.


The cloth was started with a coat of Deep Cadmium Red (Extra Deep from the old Liquitex line). areas of dead shadow tones were worked in while still wet with a touch of Mars Black here and there. This is far from the finished color as I will be working more towards a faded earthy red. This will not be a brick red nor a crimson/scarlet, but somewhere in between.


Friday, October 4, 2013

Pegaso Knight Hospitaller Bust - Update #3

 
Work proceeds on this bust with the end in sight. I have completed the armor, not a bit of metallic paint to be found on this bust. The leather belt is complete as is the hooded cape. This was a bit of fun as I wanted a faded black cloth with desert dust on it. It started with a brown-black base color over which I added lighter browns and tans to achieve the desired effect. I have begun painting the shield face and have been able to attach that item as shown. All that remains are a few details as well as the rope holding the cape and a bit of trailing strapping on the helmet.


Thursday, October 3, 2013

El Greco Laconian Hoplite - Starting the Flesh

As I said before, I have a lot of projects on the fire these days. This great bust from El Greco was on my want list for quite awhile and after recently purchasing it I put it high on my "to do" list. It has been sitting primed, on my bench for a month so last Sunday night I decided to start on the flesh.
 
I decided to try broadening my pallet for the basic flesh mid-tones, adding some tonal value changes in the basic mix rather than my standard technique. The flesh started with straight Burnt Sienna but I used, Green, Indigo, Alizarin Crimson and Brownish Madder to modify the warmth and hue of the colors prior to doing my first wet-on-wet blending. So what you see here is the outcome of these mid tones. Next I will tackle shadows and hair base tones as well as the eyes. A friday night project if ever there was one.


Saturday, September 7, 2013

Centurio Quintus Sertorius Festus - Update #7

 
The plaid cloak is finished and further detail work done as well. A step by step on this pattern technique is shown below. I am on the home stretch with this figure. A few more details and completion of the architectural feature to be added in the corner of the base. This has changed from my earlier idea of a mile marker which may not have been accurate for the time period, to a watering/drinking trough that will be the subject of my next post.


The plaid pattern is painted in oils and is a earthen toned pattern that was copied from a photo found by my friends over on the MedRom forum site. The red-brown lines were painted first using a mix of Brown Madder, Mars Yellow and Titanium White. Where the lines intersect, pure Brown Madder with a touch of Cad Red Deep was applied. Once dry every other line had a thin Indigo line applied, both vertically and horizontally. Lighter shades of Indigo were applied where the blue lines intersect and the whole was allowed to dry for a few days. A unifying neutral wash of Raw Umber, Mars Black and Burnt Sienna was applied overall to enhance the shadows. 
 
For those that may question the authenticity of my choice of pattern on this cloth, here is a link to my source material:


The beginnings of the gold work on his greaves. Base and shadow, no highlights.

Sunday, August 25, 2013

Centurio Quintus Sertorius Festus - Update #6

 
Summer is a slow time for painting figures, at least for me. With a new dog and work, summer weather slows the time for painting. However I am slowly making progress as can be seen above and below. Most of my work has been on the cloak and various small details of the figure.

 
The photo montage below shows the steps to this point in getting a convincing base tan cloak color as well as the movement on some of the finer details of the gladius scabbard, belts and armor. Now begins the process of creating a woven plaid pattern in the cloth.


Wednesday, July 31, 2013

Pegaso Knight Hospitaller Bust - Update #2


My focus on this bust has been painting the helmet armor.  The kit is obviously resin so I had a few choices for how I wanted to tackle the metal bits. The first choice and least liked for this project was simply working with printer's inks and oil paints. Due to the scale and the large smooth surface I felt that I would never be able to achieve the effect that was desired. Second choice was the use of buffed metalizers which I have used before. This choice would have required my getting the cotton buffing wheel into areas that are partially hidden by the hood, again a poor choice. My last choice and in the end, most challenging artistically was to simply paint the metallic effect in layers of white and black, followed by hints of reflected color.
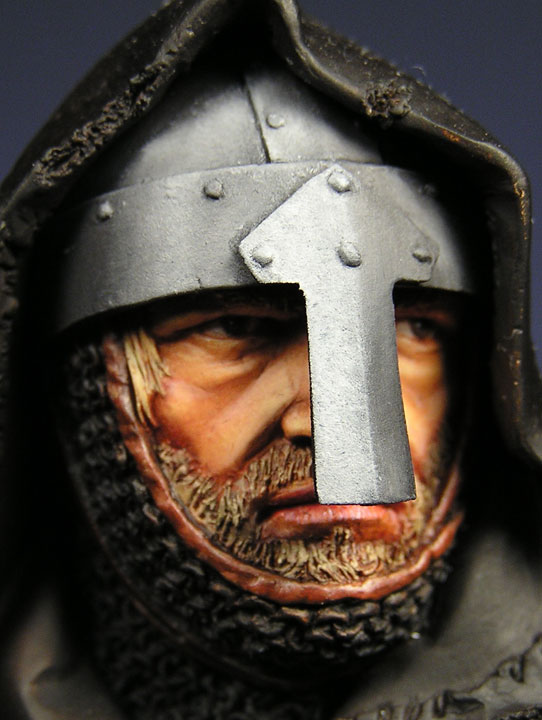

I started with a Mars Black base, allowed to dry.


To this I began applying various shades of grey, blended out to reflect the curved surface of the helm. Each layer was allowed to dry before going on to the next.


The final highlights are applied with pure Titanium White. This same technique will now be applied to the mail. You can also see a basecoat of Burnt Umber with Mars Black has been applied to the cloak and hood to begin the sun-faded black cloak of our Crusader.