Wednesday, July 31, 2013

Pegaso Knight Hospitaller Bust - Update #2


My focus on this bust has been painting the helmet armor.  The kit is obviously resin so I had a few choices for how I wanted to tackle the metal bits. The first choice and least liked for this project was simply working with printer's inks and oil paints. Due to the scale and the large smooth surface I felt that I would never be able to achieve the effect that was desired. Second choice was the use of buffed metalizers which I have used before. This choice would have required my getting the cotton buffing wheel into areas that are partially hidden by the hood, again a poor choice. My last choice and in the end, most challenging artistically was to simply paint the metallic effect in layers of white and black, followed by hints of reflected color.


I started with a Mars Black base, allowed to dry.


To this I began applying various shades of grey, blended out to reflect the curved surface of the helm. Each layer was allowed to dry before going on to the next.


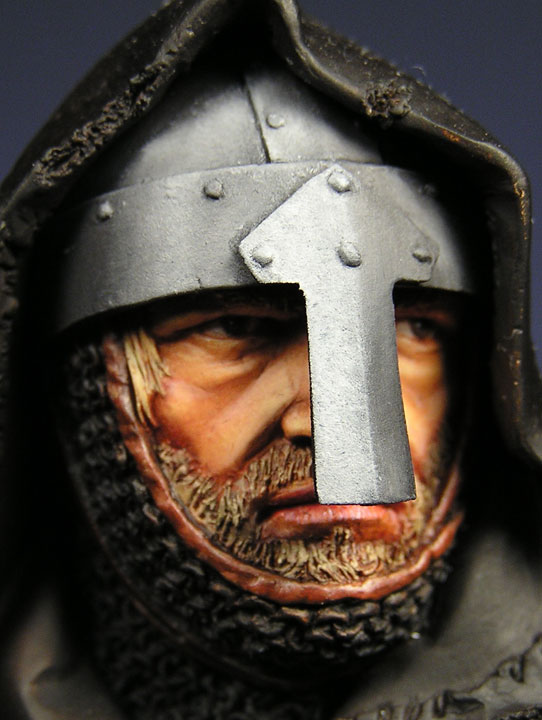
The final highlights are applied with pure Titanium White. This same technique will now be applied to the mail. You can also see a basecoat of Burnt Umber with Mars Black has been applied to the cloak and hood to begin the sun-faded black cloak of our Crusader.


Centurio Quintus Sertorius Festus - Update #5

So this is where our Roman friend stands at the moment. I have been plodding along getting the mix right and playing with a few ideas on the figure and felt it was time for an update. How I got to this point is shown below.
 

The armor had initially been given a dark wash to bring out the detail. Over this I applied a thin coat of Yellow Ochre to start the brass tones.


Additionally I began to paint the pants with Mars Yellow highlighted with Titanium White.


Yellow Ochre and Titanium White was then applied to the lower edges of the armor leaves to start bringing out the highlights.


Further highlighting with successively lighter shades of Yellow Ochre/Titanium White complete the effect as well as a few thin washes of Burnt Umber and Mars Black where the cloak will drape over the left arm and cover/shade the armor.

A glaze of Burnt Umber was applied to the pants to both create shadows and "dirty" the tone of the fabric. I was troubled by the similarity of the yellow pants and the armor. Mars Yellow and Titanium White with a wee tad of Burnt Umber were applied as highlight tones on the pants. Cadmium Red Deep and Extra Deep was mixed to start the cloth going from torque to torque around his collar.


Mars Brown was used to begin the armor's leather edging. A wash of Burnt Umber and Mars Black pull out the stitching details. The same mix was applied as a thin wash to the outline of the edges on his pteruges as well. The shoes started as Mars Orange, Mars Yellow and Burnt Sienna with Mars Black shading.


Monday, July 1, 2013

Pegaso Knight Hospitaller Bust - Update #1

As if I don't have enough irons in the fire I started a few other additional busts as well as Ludendorff so that I would pieces at various stages for my last painting class. This means I have way too many things on my workbench but I also have a lot to keep me busy and complete. All in all a mix of good and bad I guess.
 
The stages are self explanatory I guess, at least as far as the face goes:


The face was painted separately and then placed inside the hood once I got far enough along. The hood would have inhibited my brush work and the assembly is clean and easy.
 
The hood is black but cloth dyed as such would fade brown so I am working the basic undertones with mixtures of Burnt Umber and Mars Black to get the warm tones that I will eventually weather. I needed to paint the inside of the hood and the back of the bust where the shield attaches first so that assembly can continue.


The tunic is Titanium White and Raw Umber mixed and blended wet-on-wet for my initial tones.  

The next two photos show where the bust is at this point. I have yet to complete final highlights of the face but I wanted it in the hood so that I could better visualize the effects of light on the face when hooded prior to continuing.


The shield needs to be started prior to attaching to the back of the bust. I wanted a nice worn, dirty aged look to the wood, yet out of focus. This can be seen below.